


Wearing a fabric mask might not protect you 100% from COVID-19. However, studies have shown that it drastically reduces the spread and can provide some protection. Fabric masks are a great option as they are reusable and more easy to come by if you have a sewing machine and fabric lying around.
A friend from church recently asked me if I had a sewing machine. I said yes, and she then asked me if I could help make some masks. I didn’t know what I was signing up for…
That was over three weeks ago and here I am making masks every week. We are currently fulfilling needs of fabric masks for three community organizations. The numbers needed are in the hundreds and we are crushing our goals each week.
I had a bit of impostor syndrome at first as I’m not a “sewer” per say. I hadn’t even used my machine for at least six years. However, through this group of ladies at church sharing tips, tricks, fabric, and elastic, I’ve gotten in a groove and can make a simple fabric mask fairly easily.
I’d love to share it with you so you can make your own or provide some to those in need.
How To Make Fabric Masks
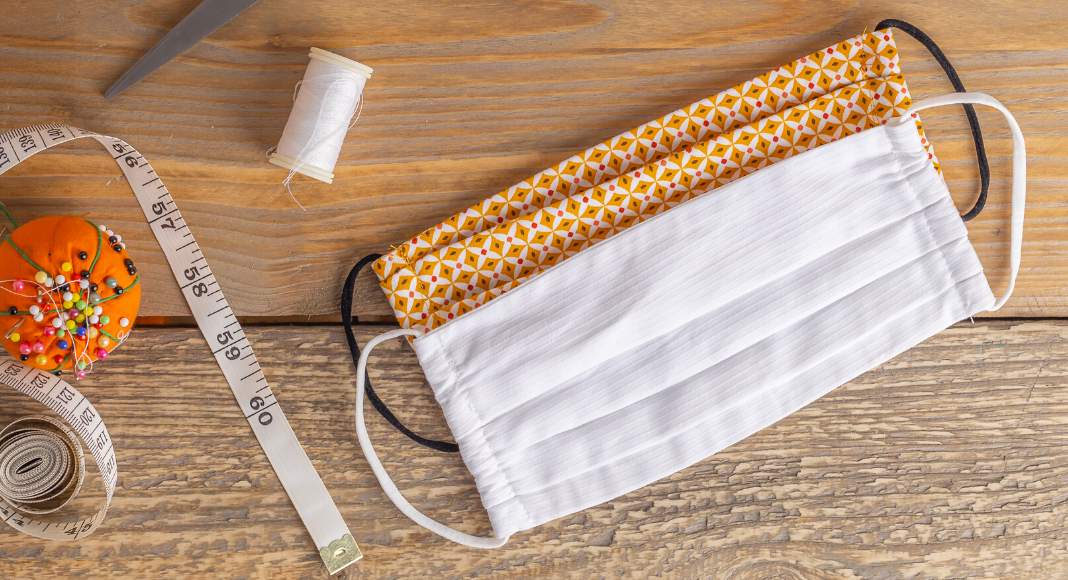
Here is what you need:
- Fabric cut 8.5 inches x 16 inches – Any kind will work, but the thicker the better for protection
- 2 pieces of elastic 6.5-7 inches long or 4 13-14 inch pieces of fabric or t-shirts (to be used as ties)
Steps:
- Fold over your piece of fabric and iron it flat with the “back or inside” of the fabric out. Now your fabric is 8.5 x 8 inches and is double layered, and is inside out.
- Start by sewing a piece of elastic right at the edge of one of the folded side corners. The elastic will lay flat against the folded edge. Sew down until the next corner. Elastic is to remain inside the folded fabric.
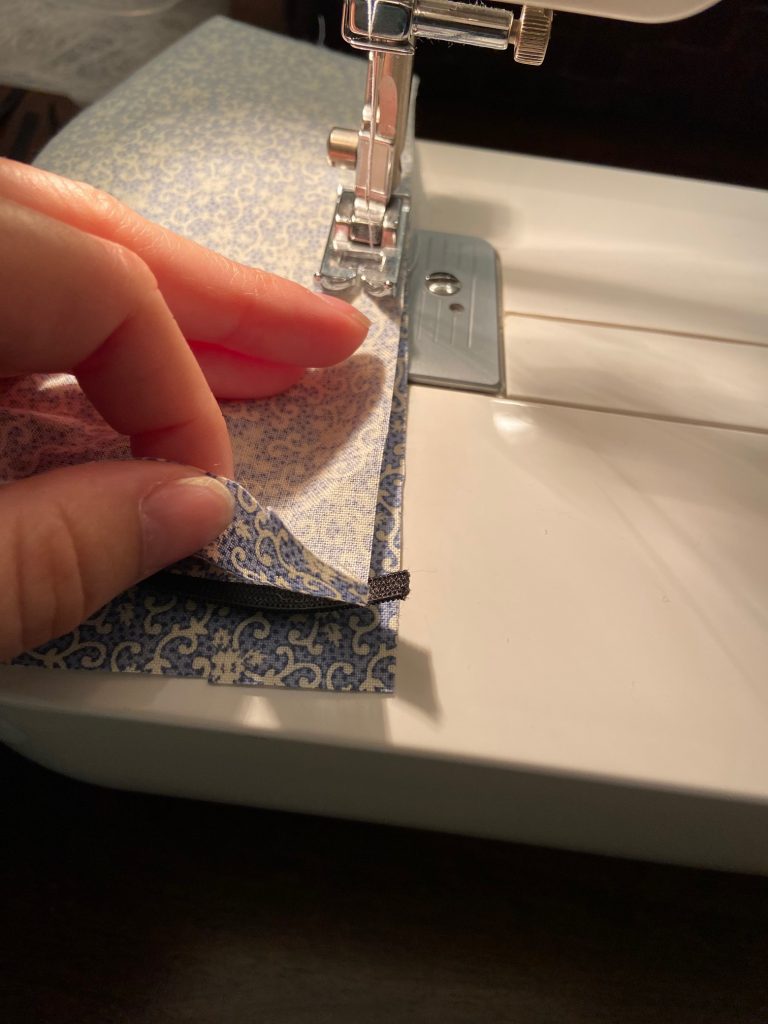
Elastic location and angle - Reach through and pull the other end of the same elastic parallel to the previous corner and sew over that piece. I sew over each elastic edge a few times forward and back to secure it well.
- Turn your fabric and sew about halfway down that side. Stop here and leave about a 1.5 inch gap of un-sewed fabric — this is important to flip it right side out.
- Sew until the next corner and repeat adding elastic to that side.
- Using the hole you left, pull the elastic through and the rest of the fabric to turn it right side out. The hole can also serve as a slot for an additional filter of sorts for the mask. You can also sew it up now if you’d like.
- Iron this square with elastic sides an then pull up fabric to make 2-3 pleats. The pleats really help the masks have a custom fit for whomever is wearing them. See top image below.


8. Pin the pleats and iron them down. Then sew a straight line down each side to secure the pleats in place. Finished product is bottom image.
9. Admire your work and make another if you want!
I’ve been enjoying using my hands to make something for people who actually need and want them. It’s also sparked some creativity in me to make some other things. Maybe I’ll venture to make my daughter something for her doll or a bed for our new cat. Either way, I’ve learned that with practice and guidance, I can sew!


