


It’s the beginning of a new year and your home is ready for a fresh start! If your family is anything like mine, you accumulated quite a bit of stuff during the holiday season and now is the time to bring order back to your living space.
As a devoted minimalist, I’m sharing personal tips that help keep my home neat and tidy. Even if you don’t aspire for minimalism, decluttering is an excellent way to be more intentional about the things you own, reduce stress, and cultivate a peaceful environment.
It can be overwhelming to envision decluttering your entire house at once so I’ll just be breaking down the kitchen today. Kitchens are one of the most used rooms in a house and with so many compartments, they can unintentionally transform into a large storage area.
Ease your frazzled mind by breaking the process down into these 9 practical steps!
1. Put it on Your Schedule
Getting started is often the hardest part and I’m sure that you can think of a million excuses not to: You’re busy, you’re tired, it isn’t that bad…
Prioritize your home by designating a specific day and timeframe to declutter your kitchen. Maybe it’s a couple of hours one evening or maybe it’s an entire weekend. Commit to a time, put it on your calendar, and then make yourself available to do it.
2. Prepare Mentally
Another reason that decluttering is difficult is because we develop emotional attachments to our possessions. Whether it’s an antique from grandma, the first blender you bought as a married couple, or your collection of “World’s Best Mom” mugs, the feelings tied to these objects make them hard to part with. The important thing to remember is that the memories still exist in your mind even if the objects are no longer in your physical space.
You’re the only person who knows what is essential to your family’s wellbeing and happiness. You have to be honest with yourself about your wants versus needs and brace yourself to say farewell to sentimental items as you declutter.
It also doesn’t matter how much you paid for an item when you initially purchased it. If it is not serving a purpose at this very moment, you don’t need it anymore.
 3. Get Ready to Sort

Before you dive in, grab several trash bags or boxes and label them “move,” “trash,” “donate,” and “sell.” This will help you categorize the things you’ve decided to remove from the kitchen.
Move: Sometimes random things make a home in your kitchen, like toys or paperwork. Set these types of items aside and relocate them to their rightful places later.
Trash (or Recycle): These are items that are broken, worn out, or expired. You’re clearly done with them and they’ll serve no purpose to anyone else.
Donate: If you have items that are in fairly good condition and can be reused, consider passing them on. Offer them to a friend, neighbor, charity, or your local Buy Nothing Project.
Sell: You can try to make a few dollars off of high-quality things that are brand new or barely touched. Facebook Marketplace, Mercari, and Ebay are just a few places where you can list valuable items online.
4. Sort Through Food
It’s time to get to work! Start by taking everything edible out of your refrigerator, pantry, and cupboards. Unopened cans, boxes, and bags of food that you don’t intend to eat can be donated to food pantries. Anything that is expired or stale immediately goes into the trash. You can also get rid of the single serving, fast food condiments you’ve been holding onto “just in case.”
Don’t forget to whittle down your medications, vitamins, and supplements, too. Again, if they’re expired or just collecting dust, throw them away!
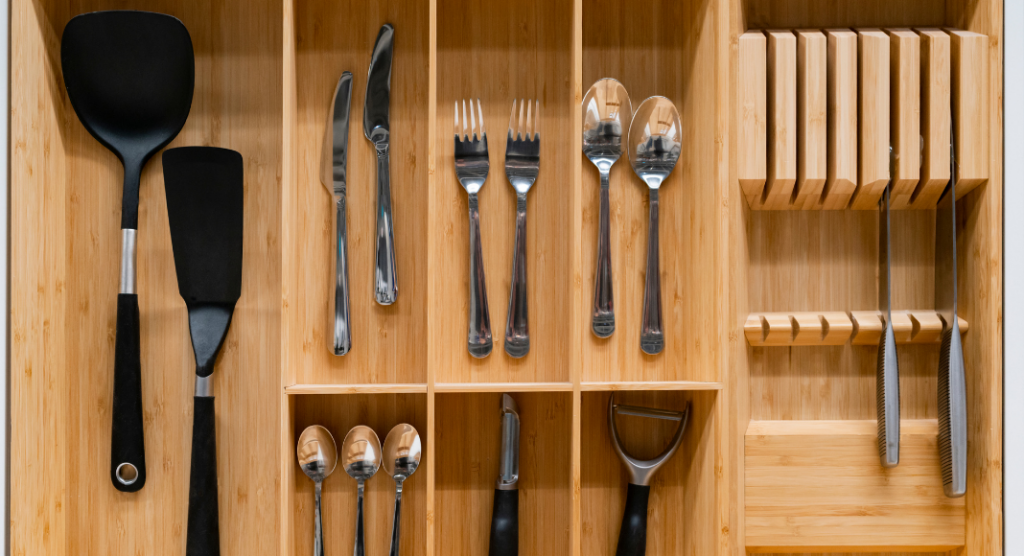
5. Empty Drawers and Cabinets
Put everything out on your counters and start by assessing your duplicates. As you decide whether or not to keep things, consider how many people are in your family, how frequently you actually use them, and much space those things are taking up. Your family of four probably doesn’t need 16 spoons and 20 glasses. A few things to look especially closely at are silverware, knives, wooden spoons, Tupperware, and drinking vessels, like mugs, glasses, and tumblers.
When you get to your junk drawer(s), be liberal about throwing things away. It’s called junk for a reason! Don’t hesitate to toss takeout menus, old mail, or miscellaneous cords.
Use this time to sort through your cleaning supplies, too. Try to narrow it down to one or two cleaners, multipurpose spray would be optimal, and a couple of sponges or microfiber clothes.
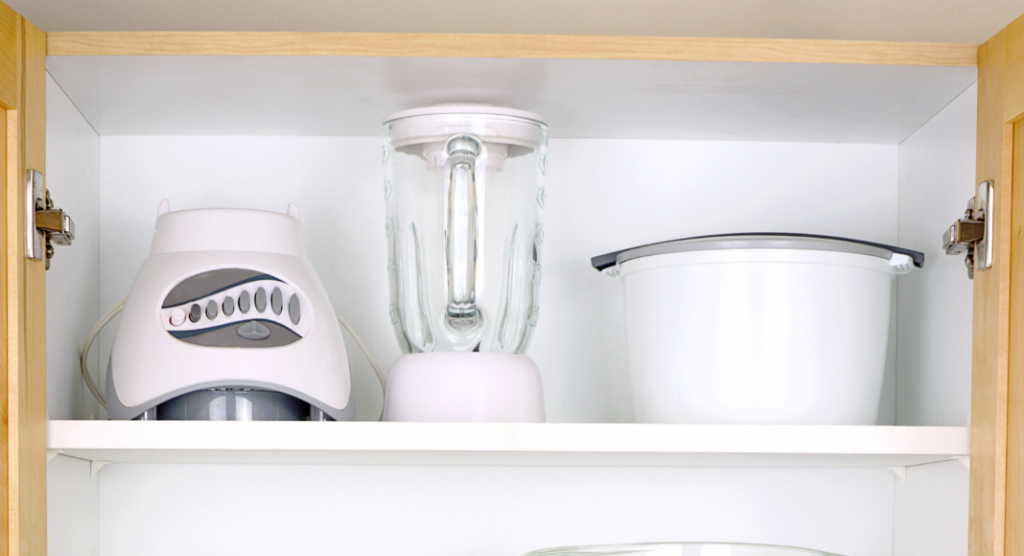 6. Examine Appliances, Pots, Pans, and Bakeware

These large items consume the most space and getting rid of them is a chance to free up a lot of room. Anything that is broken, missing parts, rusty, or you don’t use regularly can immediately exit your kitchen.
Take a moment to examine your all of gadget’s functions. You don’t want to keep multiple appliances that do the exact same job. For instance, if you have a working toaster and an oven, you don’t need a toaster oven. Or you might want to swap out your rice cooker and slow cooker and just get an Instant Pot that has both of those settings. Focus on downsizing and consolidating.
7. Put Everything Back
When you reassemble your belongings, put them in places that make sense for your family. I can’t tell you the best way to organize your specific kitchen, but I can say that the fewer things you have, the easier it will be to stay clean and tidy. Create systems that work for you and stick with them consistently until they become habits.
8. Clear All Surfaces
Some decorative pieces can personalize a kitchen, but try not to use your counters as storage space. Bare counters are very pleasing to the eye and can be instantly relaxing.
As for the fridge, you might like keeping time sensitive information on the doors, but ask yourself whether those magnets, photos, artwork, and flyers are absolutely necessary.
 9. One Final Look

Now that you’ve purged as much as you could, scan your entire kitchen to see if there’s anything you missed. If you haven’t achieved a calm, tidy space, keep working to improve it.
We often tell ourselves to hold onto things because we fear we might need it one day. If you’re unsure if you need something, put it in a box and stick it in your garage or a closet. If you can go a few weeks without using it, it’s time to toss, donate, or sell!
Once you’ve finished decluttering your kitchen, you can apply many of these rules and procedures to other rooms of your house! Make sure to take pictures of the process. It’s incredibly satisfying to look back and reflect on how much you’ve decluttered!
Click here for a list of books with more ideas and inspiration related to decluttering and minimalism!


