


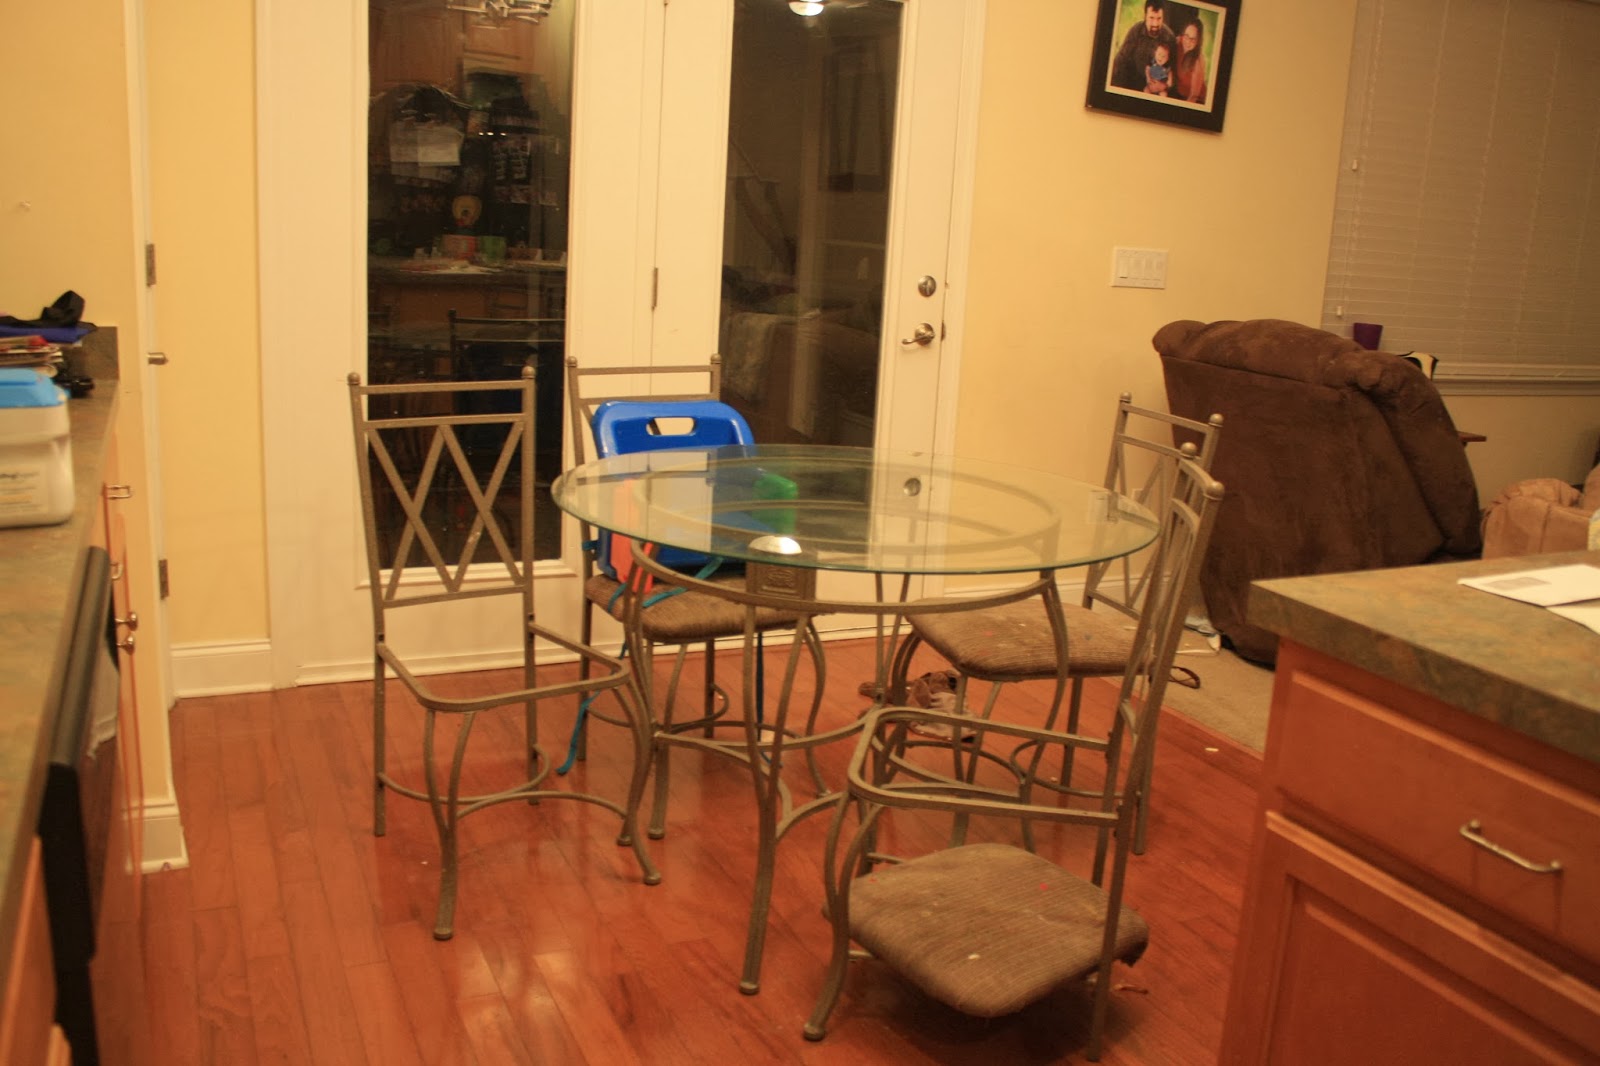
When we first moved into our house in Lexington, we needed a new dining table, and on a (stupid) whim I bought one with a glass top. Bad idea. I am not a clean enough person to wipe down a glass tabletop as often as I should. And the seats on two of the chairs kept coming off. If you came to our house, it wouldn’t be anything to see a metal chair frame sitting in the corner with the cushion lying on the floor.
I finally decided I’d had enough. We weren’t in a position to buy the type of table I wanted. So I decided I was going to fix and refinish the table we had. I had new wood bases cut for the chairs and I decided to change the disgusting seat fabric to a wipeable vinyl. Here is how I did it.
The Seat Cushions
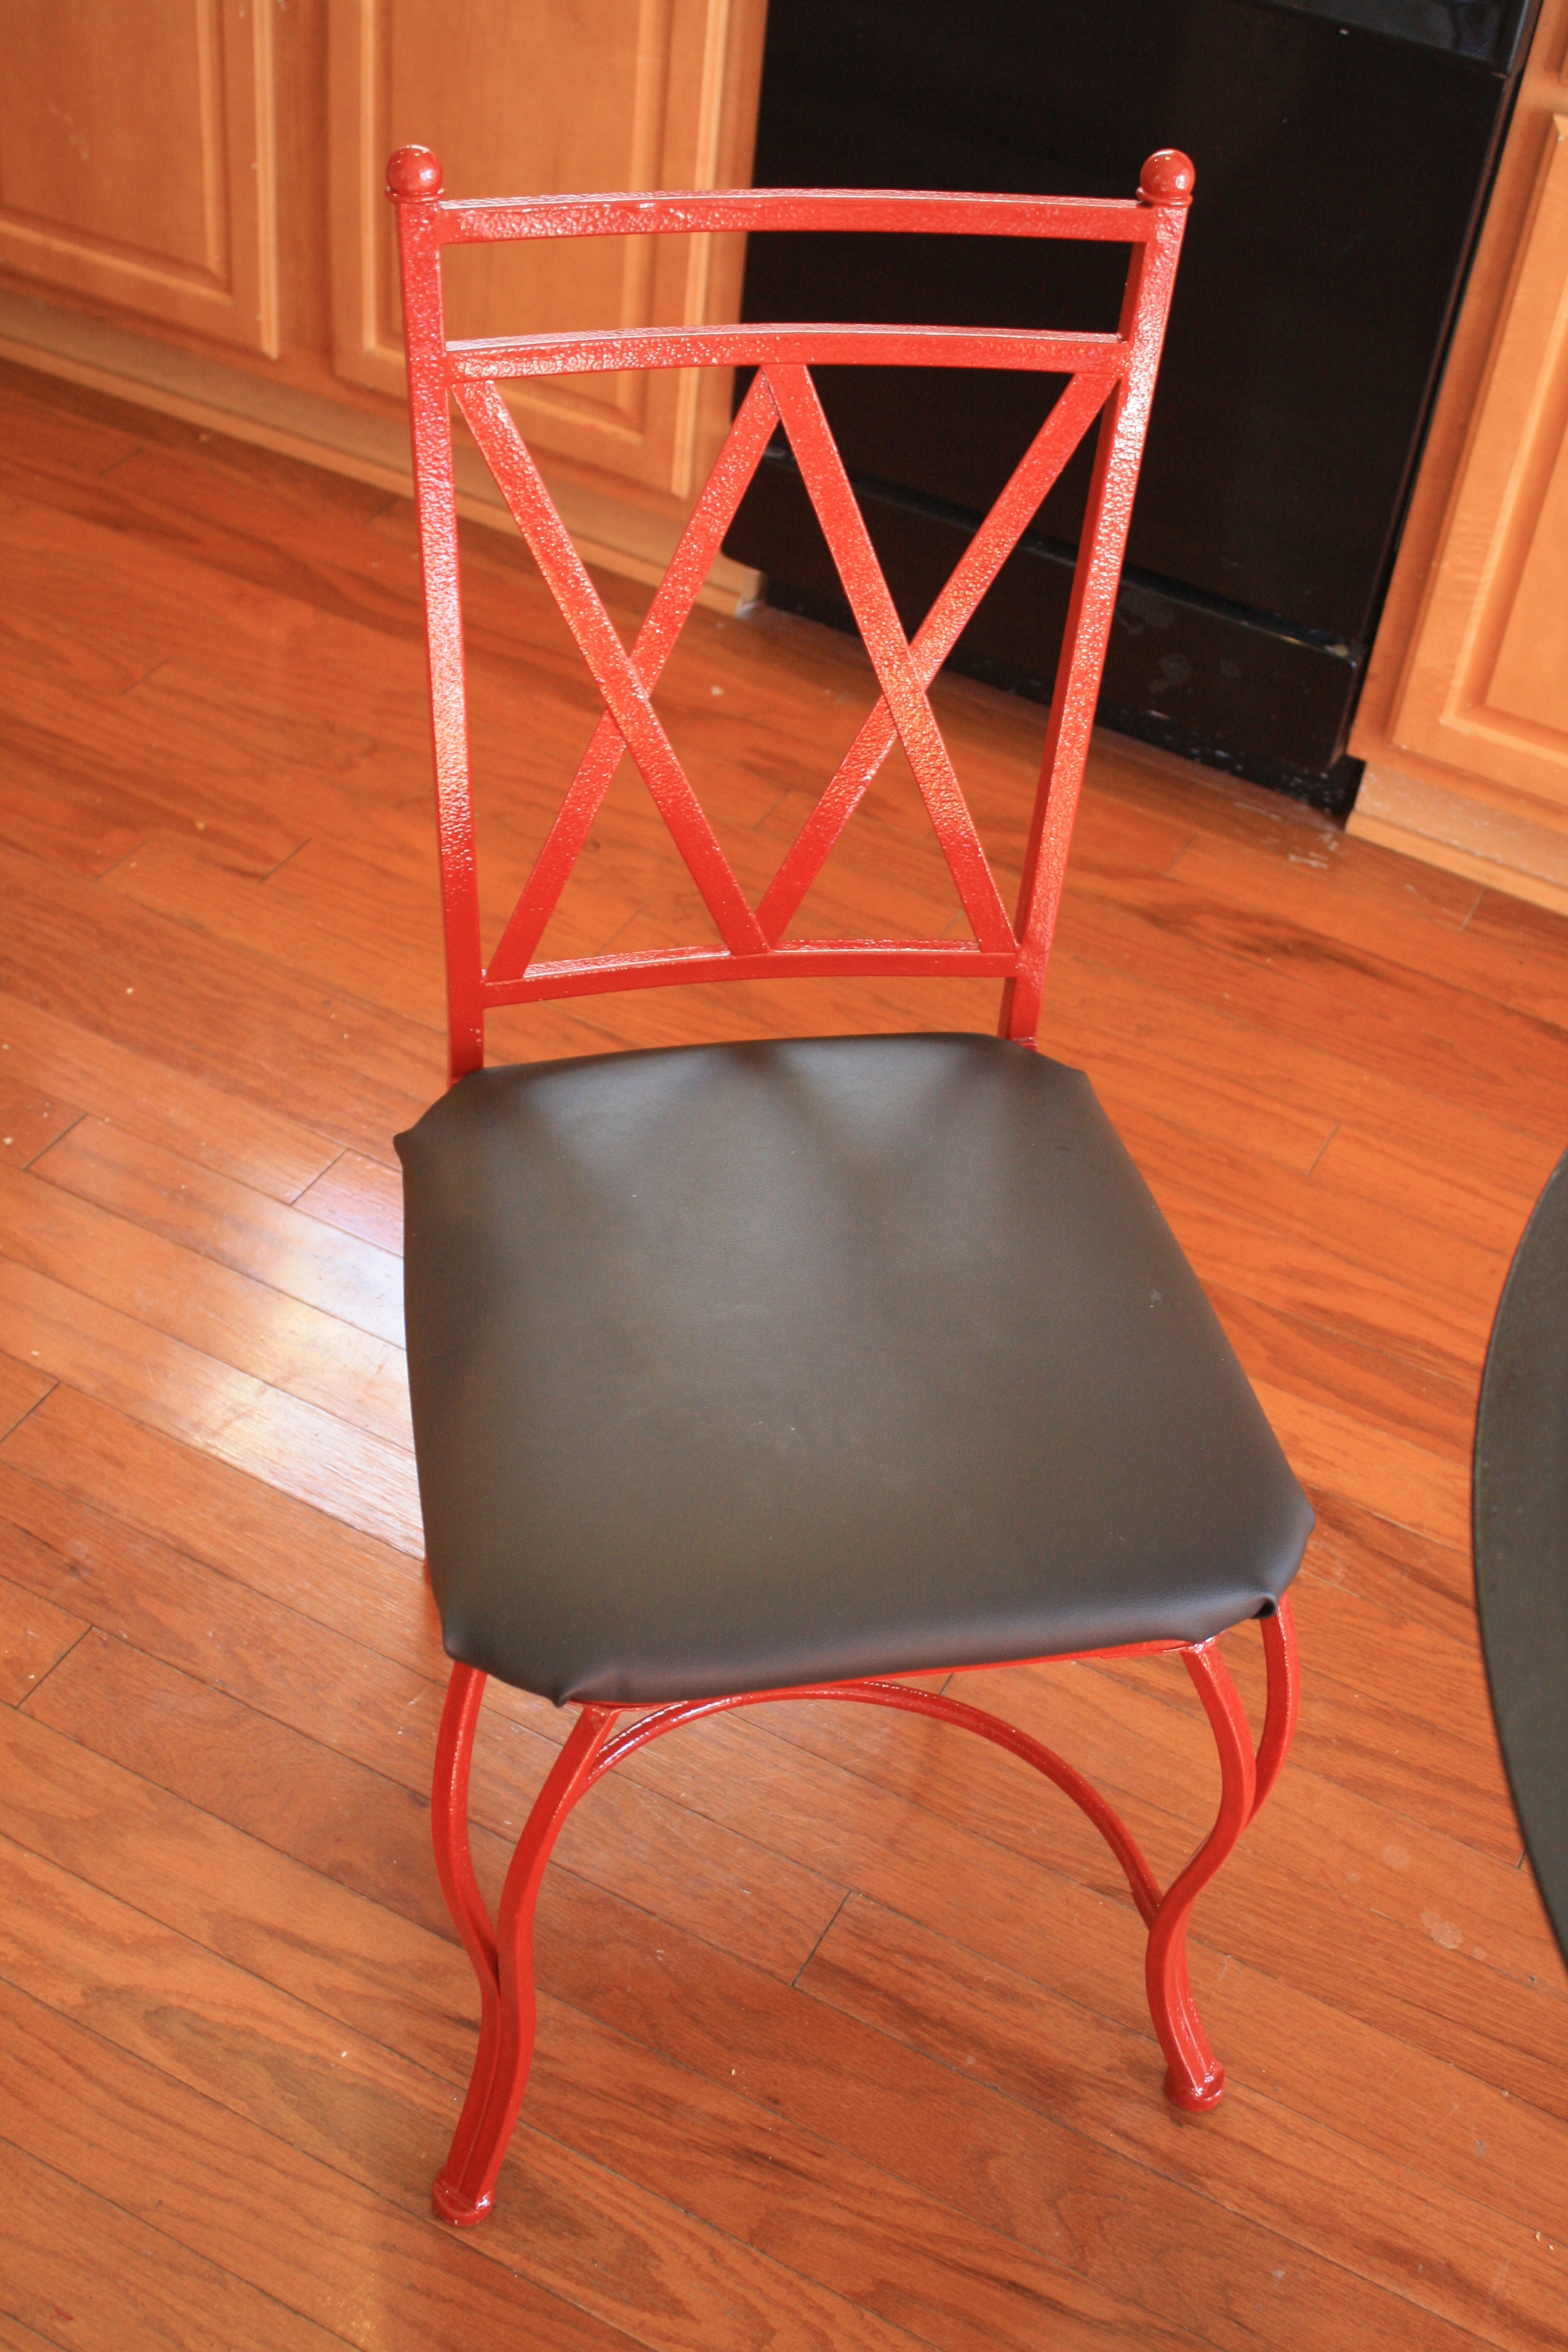
- First I unscrewed the seat from the base and took off the fabric and old padding.
- I’d bought new padding at Hancock Fabrics on Harbison Boulevard; I glued it on top of the new wood bases.
- To cover the bases, I started by putting the vinyl face down on the table and then put the new cushion, padding side down, on top of the fabric. (Side note: If you are using a fabric with a pattern, make sure the design is centered or is placed properly. If you have a striped pattern, for example, you wouldn’t want the stripes to be going off center.)
- Next, I wrapped the fabric around the cushion and stapled it to the wood base. When stapling the fabric, I started at the center of one side and stapled my way towards the outer corners. Leave space at the actual corners; you’ll do those at the end, after all four sides have been stapled.
- Staple each side as you did the first. Make sure to pull tightly when you start the other sides.
- Finish by stapling the corners. Fold the fabric like you are wrapping a birthday present. Hold it tightly and turn it right side up to check if the corner is laying as smooth as possible before you staple. (If it doesn’t lie right the first time, keep trying. Don’t get discouraged.)
- Once all four corners are stapled, you are ready to attach the seat back to the frame.
The Tabletop and Frame
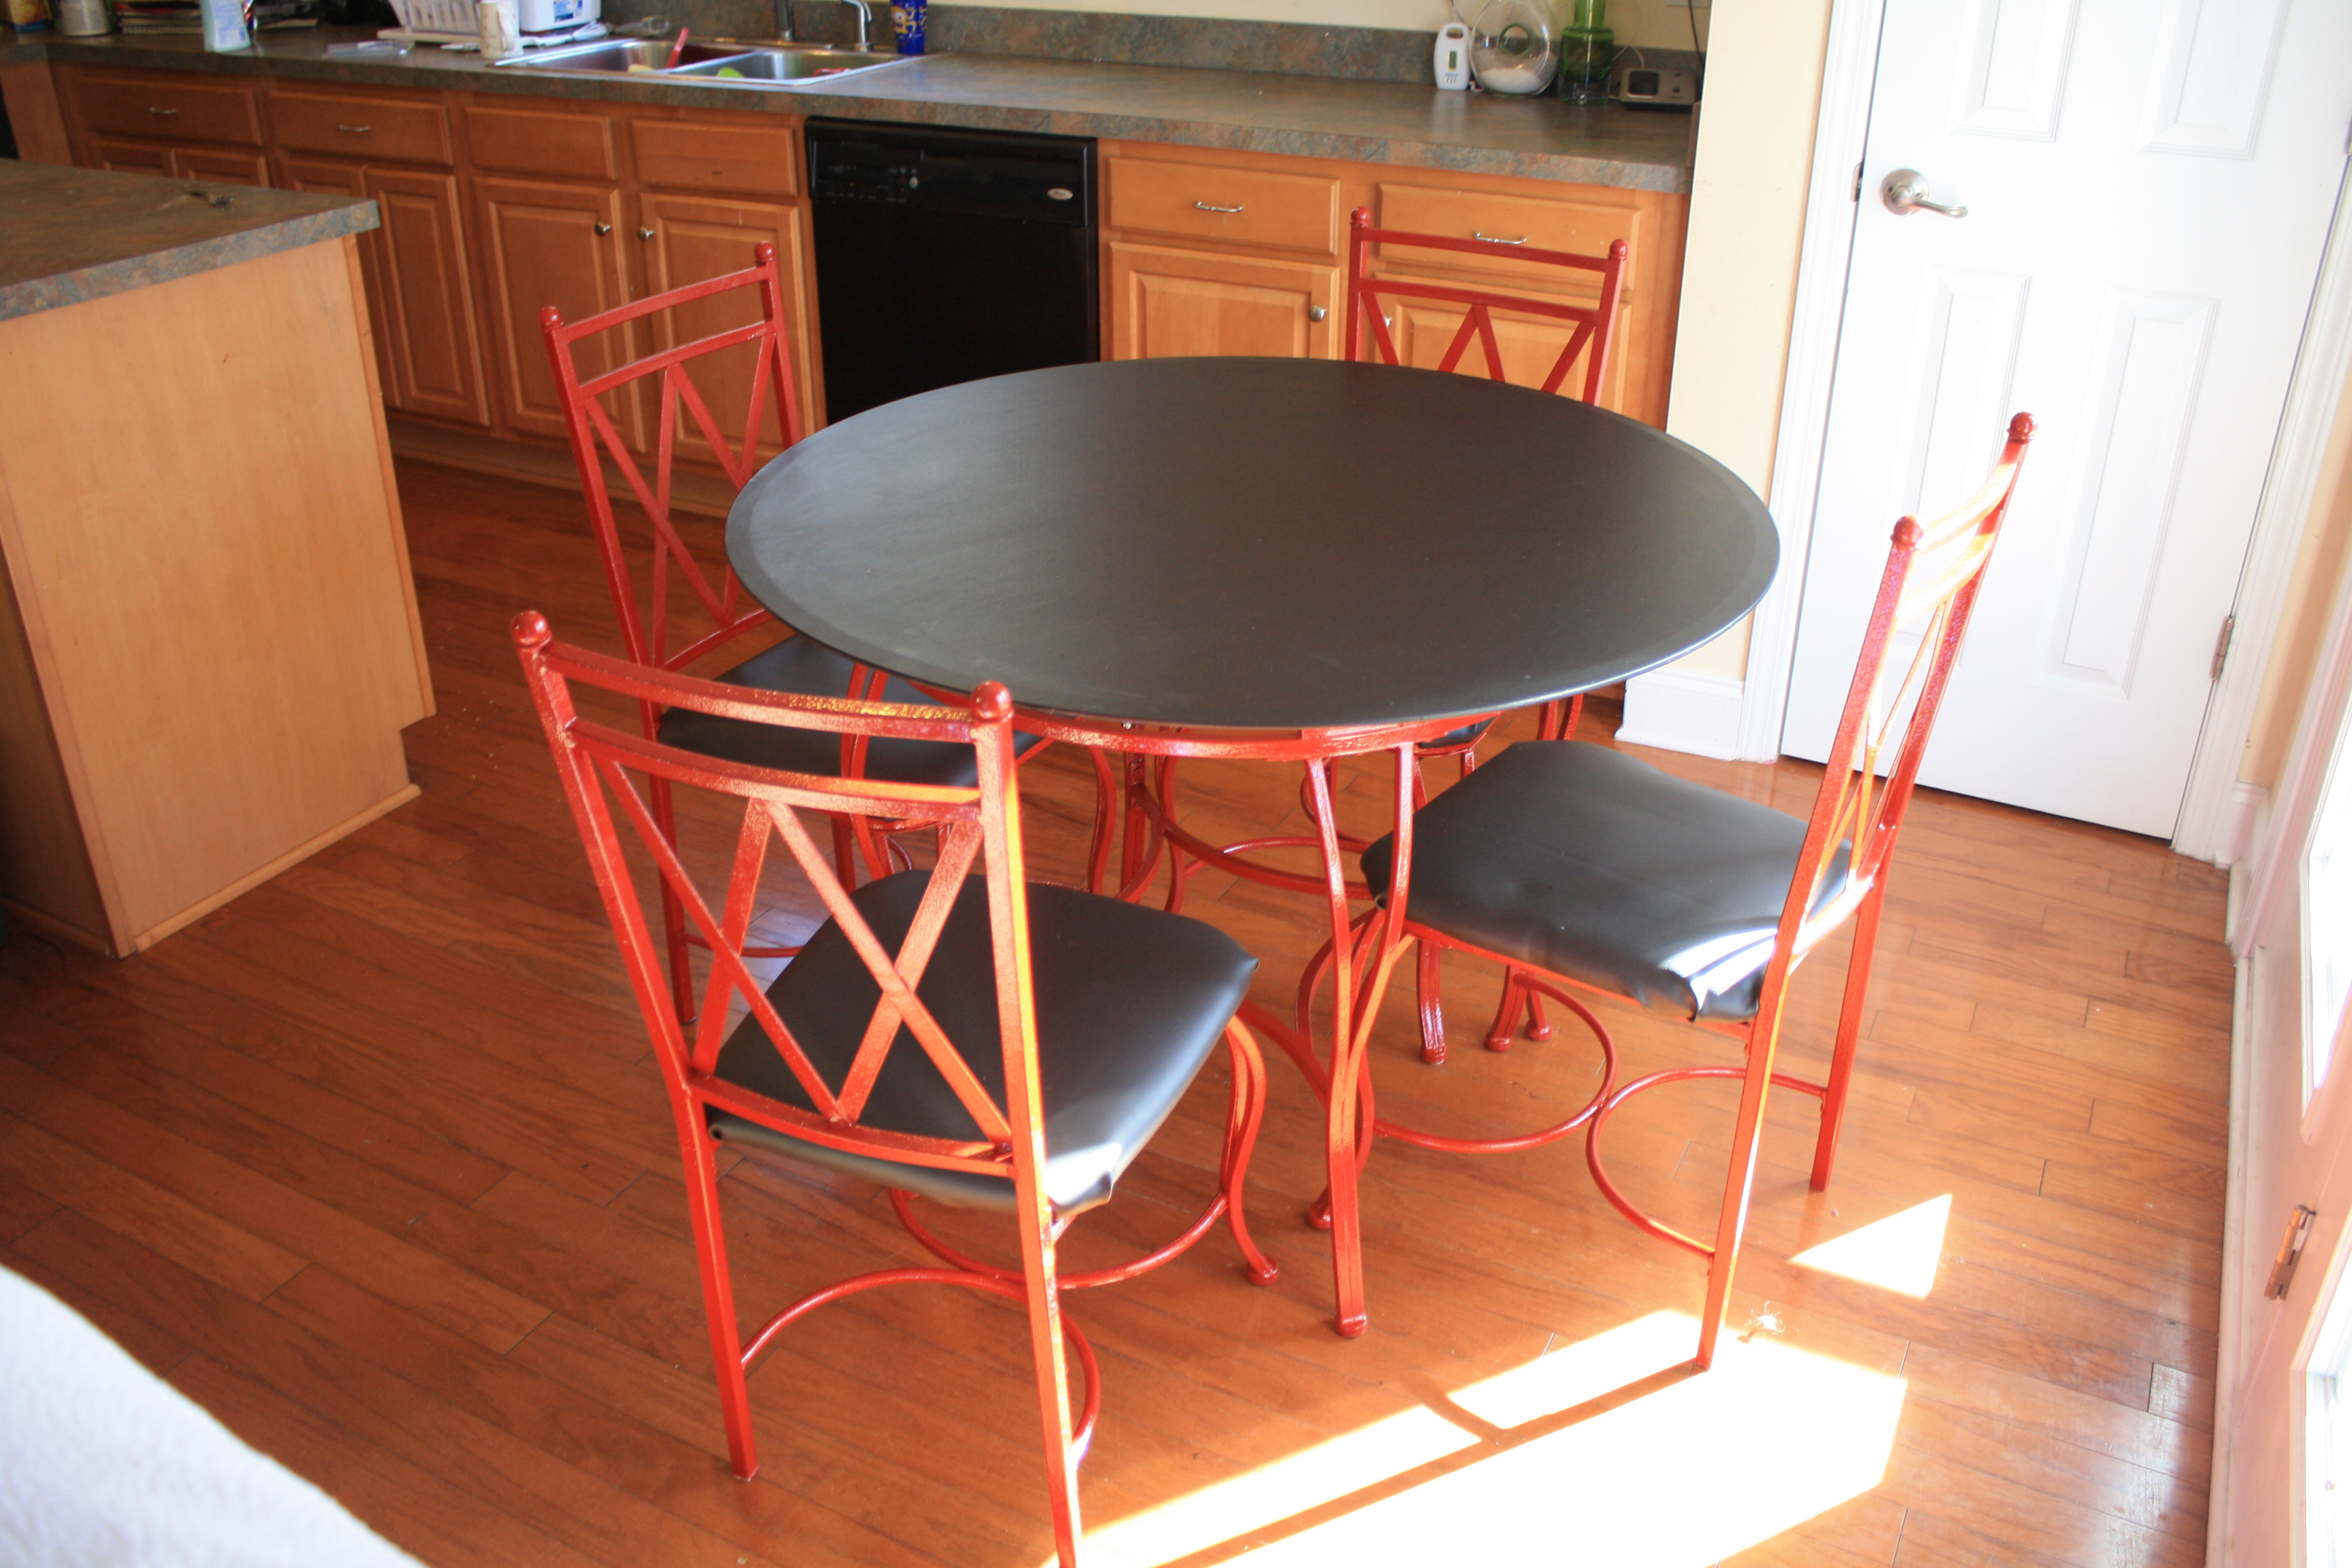
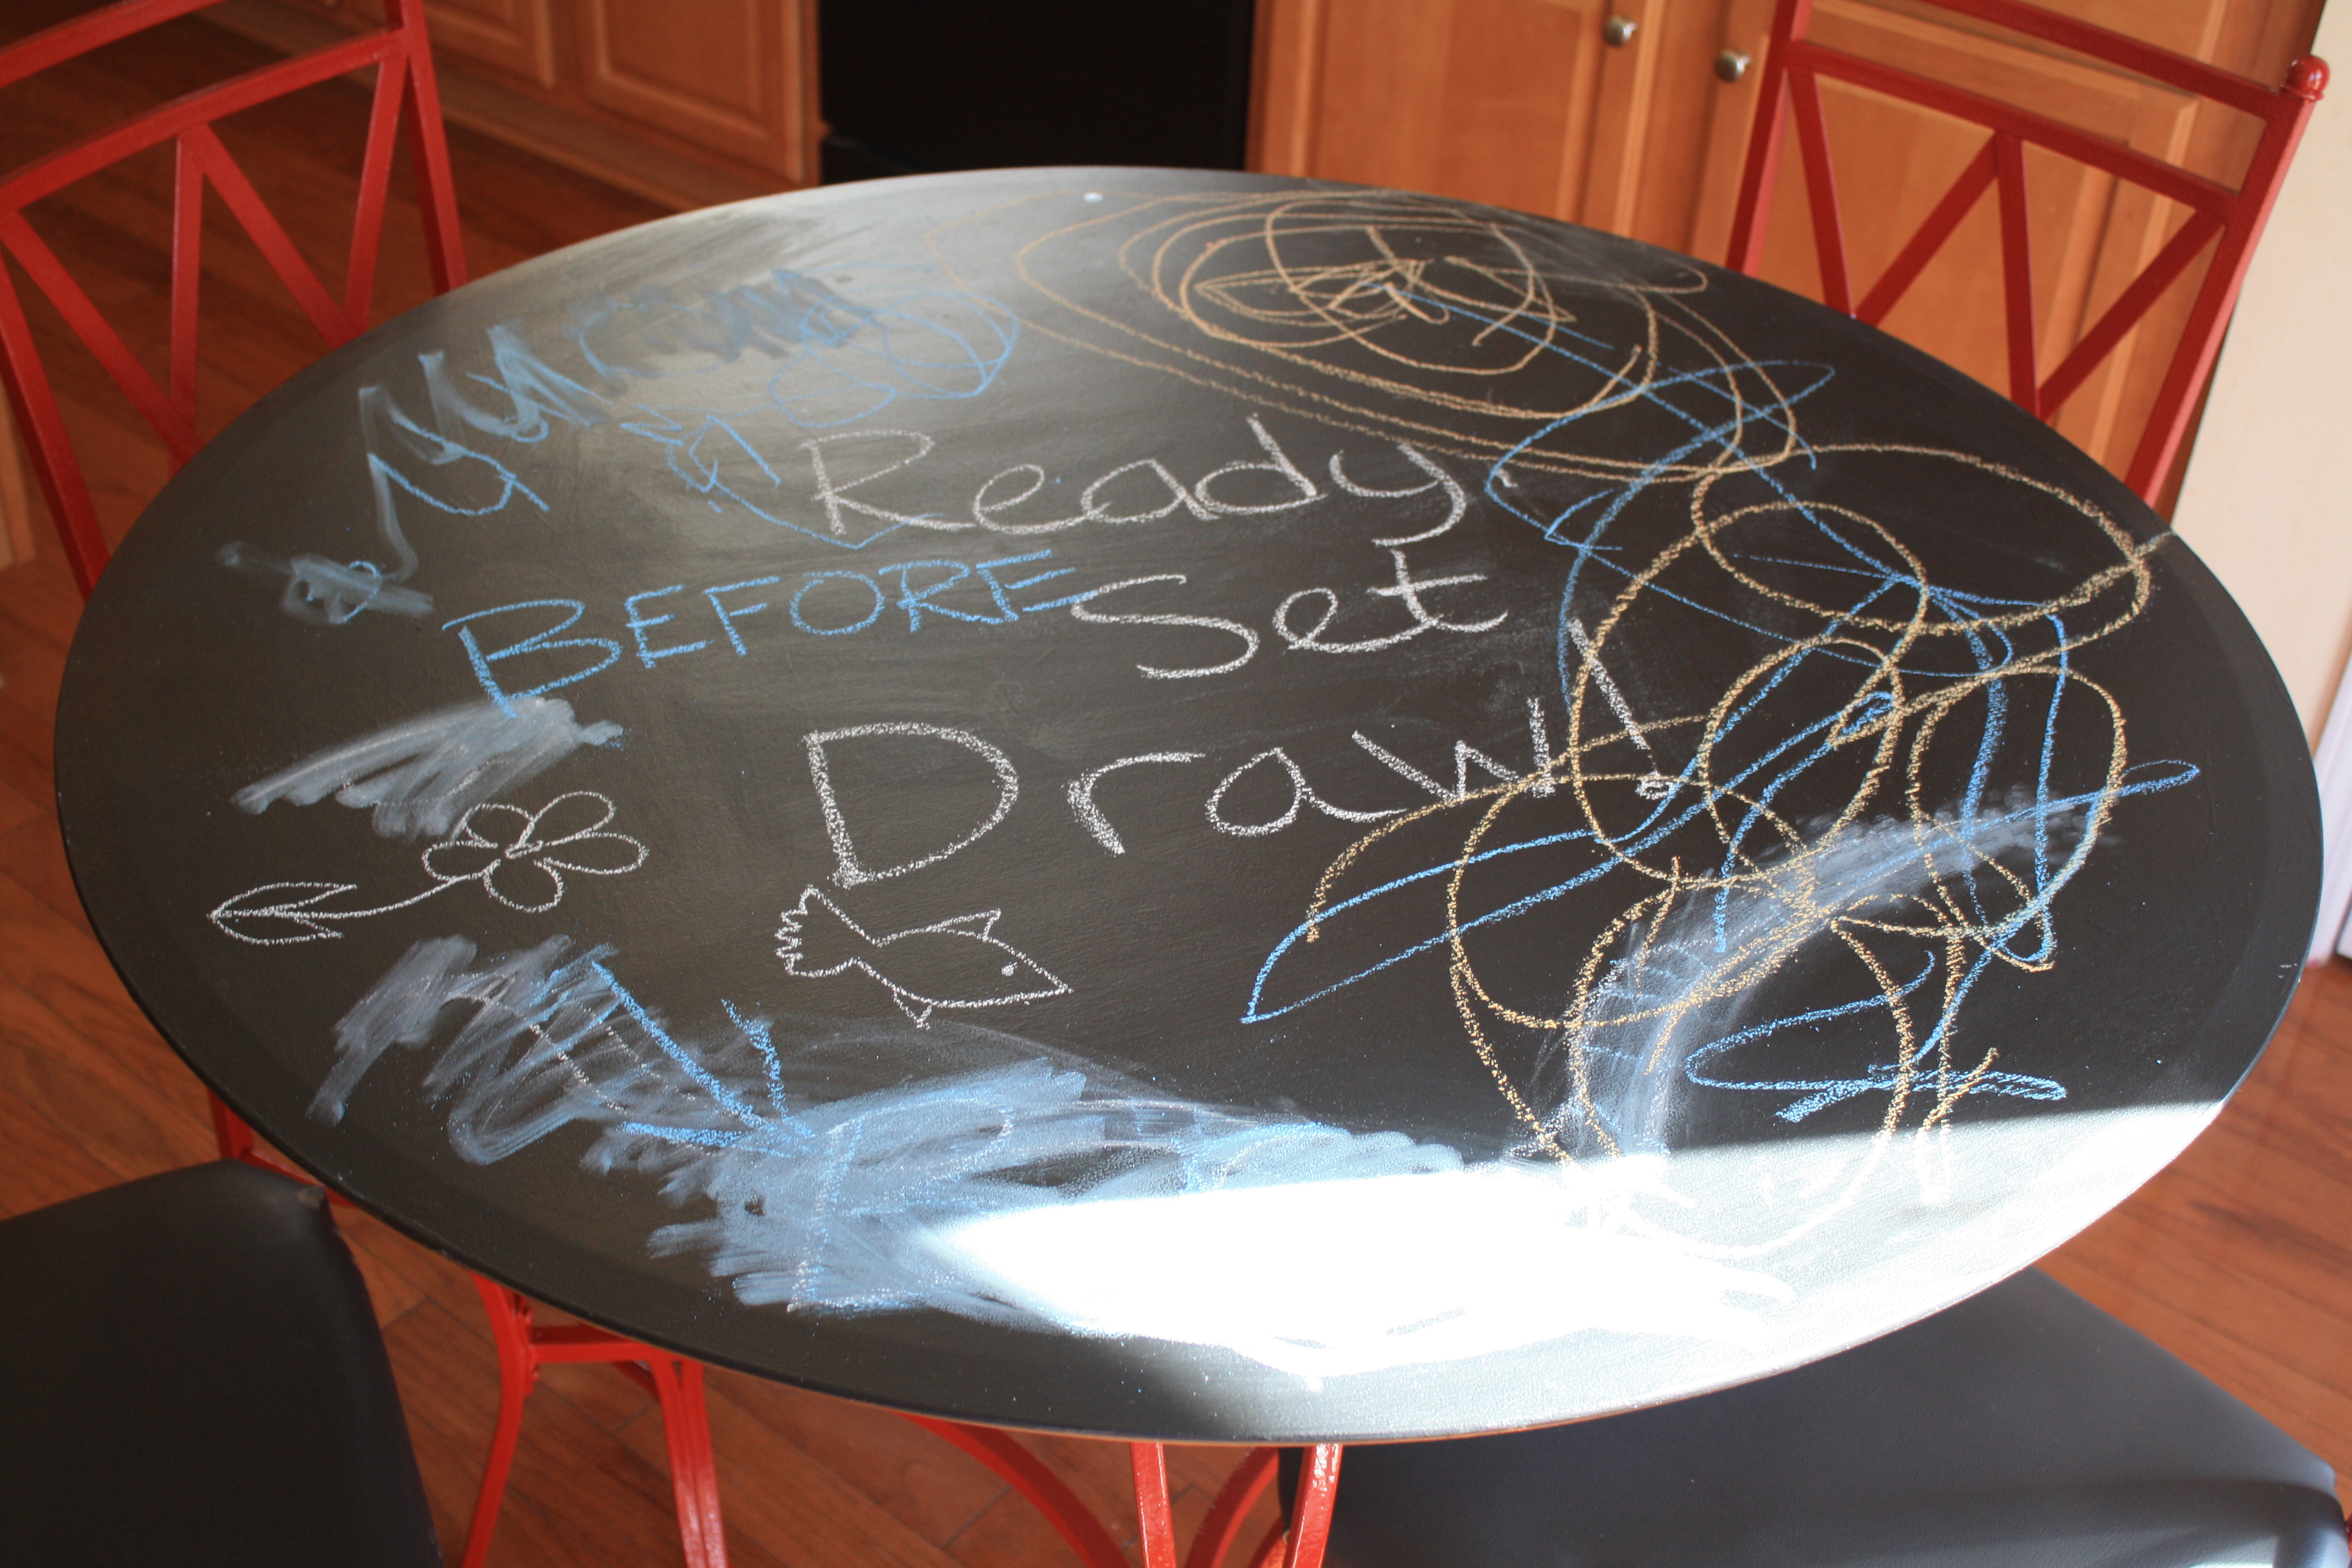
I knew that I wanted to do something to change our glass table, but didn’t know what. And then it came to me. CHALKBOARD TOP! There was no more thought about it. Since I was painting the top, and changing the fabric for the chairs, I decided to pain the table frame and chair bases as well.
- Clean all surfaces.
- I painted an oil-based primer on the metal base and the glass. Cleaning oil-based paints off brushes and such, in my opinion, is smelly and a pain. So, I bought a couple of the cheap $1 foam rollers that come with a little tray. That way, when I was done, I just threw them away instead of cleaning them. Of course, remember to paint in a well-ventilated area. Outside is great, but don’t start this sort of project in 40-degree weather like I did. (The paint dried fine, it was just cold)
- I sanded with an 80-grit sandpaper, for a smooth surface. Then I cleaned the surface again.
- I painted the base with an oil-based paint, using a new/clean cheap $1 foam roller with a few coats.
- Once the base was dry, I put the (now primed) glass top back on. I sanded and cleaned it, and then used another foam roller to coat the top with the chalkboard paint.
- I used chalkboard paint from a can, which can be found at any hardware store or Walmart. You use chalkboard paint like you would any other type of latex paint.
- After the first coat was dry, I sanded any uneven areas, cleaned the surface and applied the final coat of chalkboard paint.
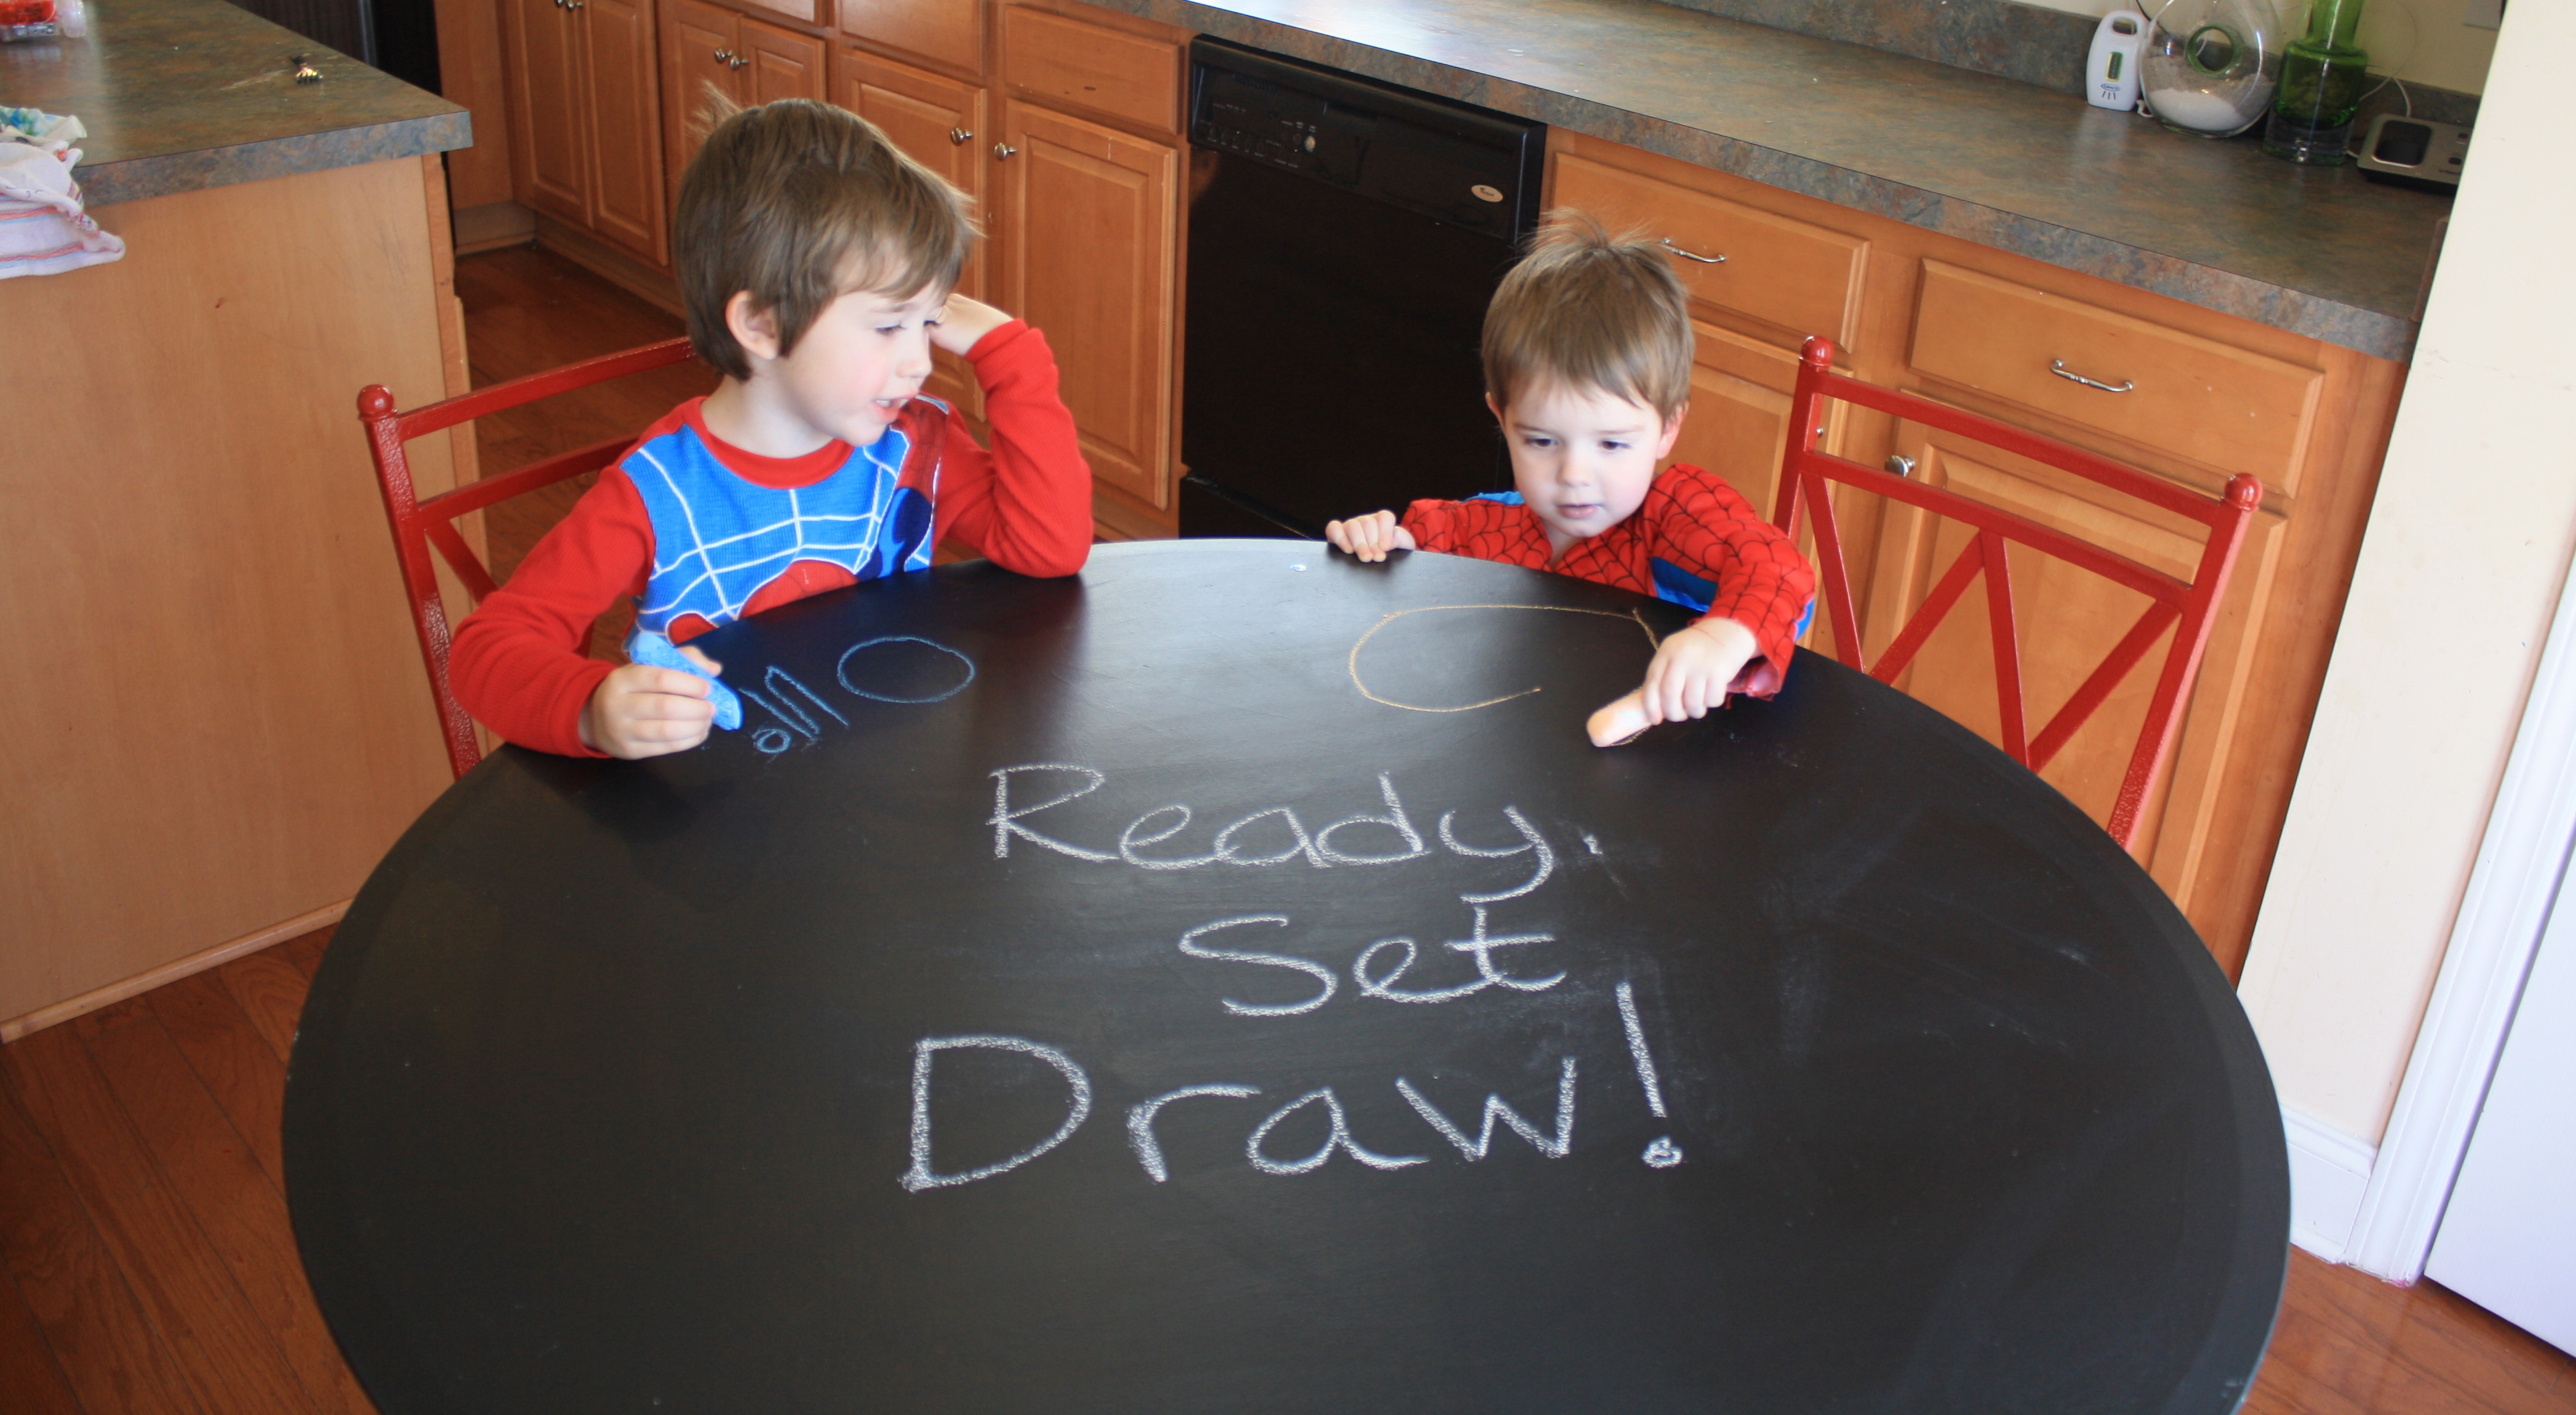
- Allow several hours for the paint to dry, and get ready to draw!
That’s it. It really was easy and fun. I love color and am not afraid to be bold. Any way I can make my furniture kid-friendly is a bonus in my book.
My kids enjoy drawing on the table when I remind them that they can. But since it is our dining table they often forget that it has this cool feature. It is just like any other chalkboard surface: Color and create to your heart’s content and a little soap and water to clean up and start again.
As I said earlier, I have a tendency not to wipe off the table as soon after dinner as I should, so there have been times a hard noodle or dried piece of cereal has been stuck to the surface. My husband thought it would be a swell idea to take a fork and forceably scrape said food off, so some of the paint has been scratched. But with a little sanding and another coat of chalkboard paint, it’s as good as new.
Have you added a fun DIY project to your home? Tell us about it in the comments — and share PICTURES!


